Recently, I got my hands on TI‘s HDC1050 low power, high accuracy digital humidity/temperature sensor chip. The supply voltage of this chip can range between 2.7V and 5V, making it possible to interface with 5V MCUs such as Arduino directly. I created an Ardunio library for this sensor and will discuss its usage in this post. The code can be downloaded towards the end and can also be found on my GitHub page.
HDC1050 uses I2C bus to communicate with the MCU. By default, the resolutions for both the humidity and temperature measurements are 14 bits and the default measurement mode acquires both the temperature and humidity readings. The default acquisition time is just under 13 ms, which is fast enough for most of the applications. If faster acquisition is needed, you can either reduce the measurement resolution, perform only needed measurement (e.g. temperature or humidity, but not both) or do both. Humidity only measurement can be made within 2.5 ms when done in 8 bits and temperature only measurement can be made within 3.7 ms using 11 bits.
Here is a list of some common functions in the HDC1050 library:
unsigned int getManufacturerID();
unsigned int getDeviceID();
String getSerialID();
bool batteryOK();
void setTemperatureRes(byte res);
void setHumidityRes(byte res);
void turnOnHeater(bool heaterOn);
void updateConfigRegister();
float getTemperatureHumidity(float &t, float &h);
And here are the detailed descriptions for each of the functions:
getManufacturerID
This function returns the manufacturer ID of HDC1050, 0x5449.
getDeviceID
This function returns the device ID of HDC1050. The device id for HDC1050 is 0x1050.
getSerialID
This function returns the 40 bits serial number in string format. The serial number is unique for a given device (e.g. 1acf718f380).
batteryOK
Returns true if the supply voltage to HDC1050 is greater than 2.7V, otherwise returns false.
setTemperatureRes(byte res)
Sets the temperature measurement resolution. Acceptable values are T_RES_14 for 14 bits measurements and T_RES_11 for 11 bits measurements. Note, the new setting will only take effect when updateConfigRegister is called.
setHumidityRes(byte res)
Set the humidity measurement resolution (H_RES_14, H_RES_11, H_RES_8). Note, the new setting will only take effect when updateConfigRegister is called.
turnOnHeater(bool heaterOn)
Turn the built-in heater on or off. This function is useful when testing the device. Note, since the heater is only on during the measurement time the measured temperature increases rather slowly. Nevertheless, the effect of the heater is visible in both the temperature and the humidity measurement. This setting will only take effect when new temperature measurement is made after updateConfigRegister has been called.
updateConfigRegister
The configuration byte (the high byte) is cached when setTemperatureRes, setHumidityRes and turnOnHeater are called so that multiple settings can be configured with a single update. If changes have been made to the configuration byte, call this function to make sure that the new setting takes effect.
float getTemperatureHumidity(float &t, float &h)
Use this function to acquire the measurement readings. For convenience, each measurement returns both the temperature and the humidity values. The two by-ref parameters are the temperature reading in Celsius and the relative humidity reading in percentage. The function also returns the temperature value in Fahrenheit so no additional conversion is necessary.
Note that this function is optimized for the maximum measurement resolution and there is a fixed 50 ms delay for adequate conversion time. If you have tighter timing requirement, you can use the exposed readRegister method with your own timing for the specific resolution and measurement. Please refer to the source code for more details.
In most cases, the two lines below are all that is needed to make temperature and humidity measurements after the HDC1050 header file (HDC1050.h) is included.
HDC1050 hdcSensor;
tf = hdcSensor.getTemperatureHumidity(tc, h);
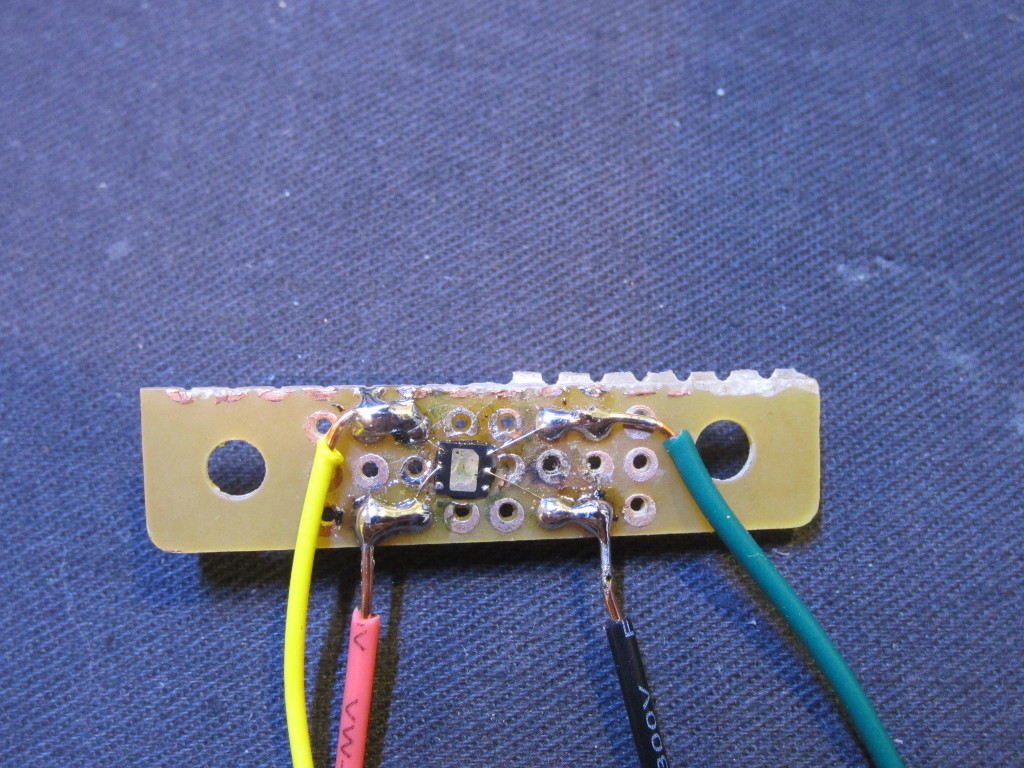
HDC1050 comes in small outline no-lead (3mm X 3mm) packaging, which could be a little bit challenging to solder without using an appropriately etched PCB. Luckily, there are only four pads need to be soldered, and with a little patience you can mount it on a standard proto-board and solder the leads by hand.
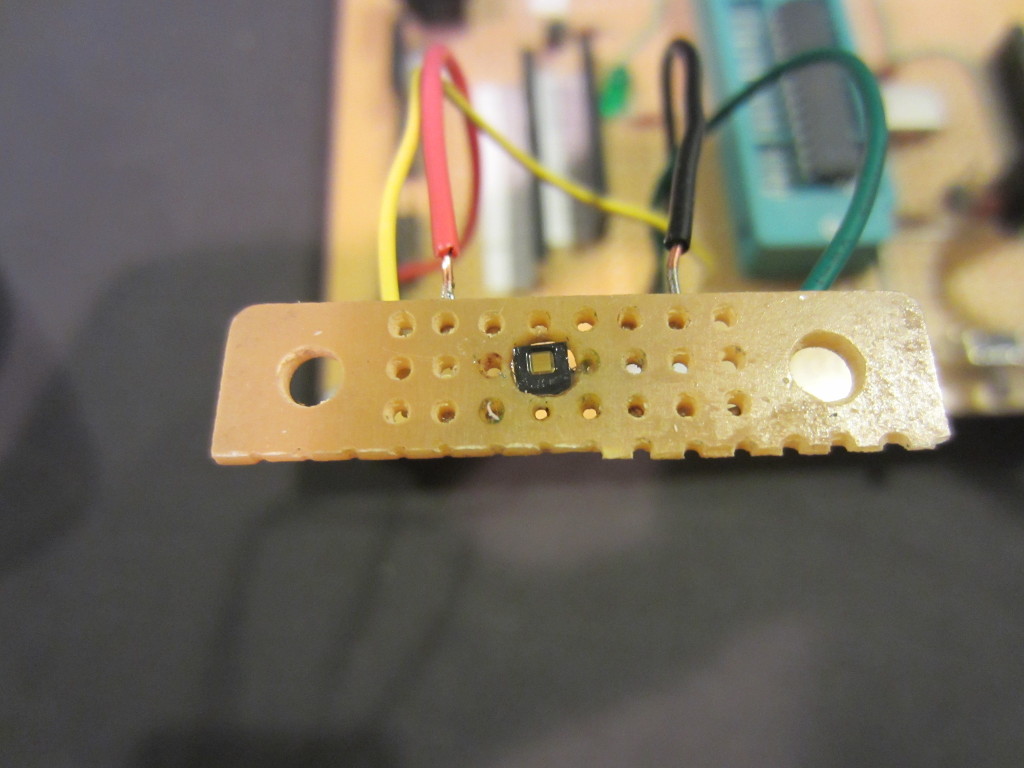
The two pictures below illustrate the method I used for prototyping. Here I drilled a small hole on the PCB so that the chip could be held inside snugly. This way, the sensor side of the chip can be exposed and at the same time I can solder wires on to the pads at the bottom of the chip.
|
|
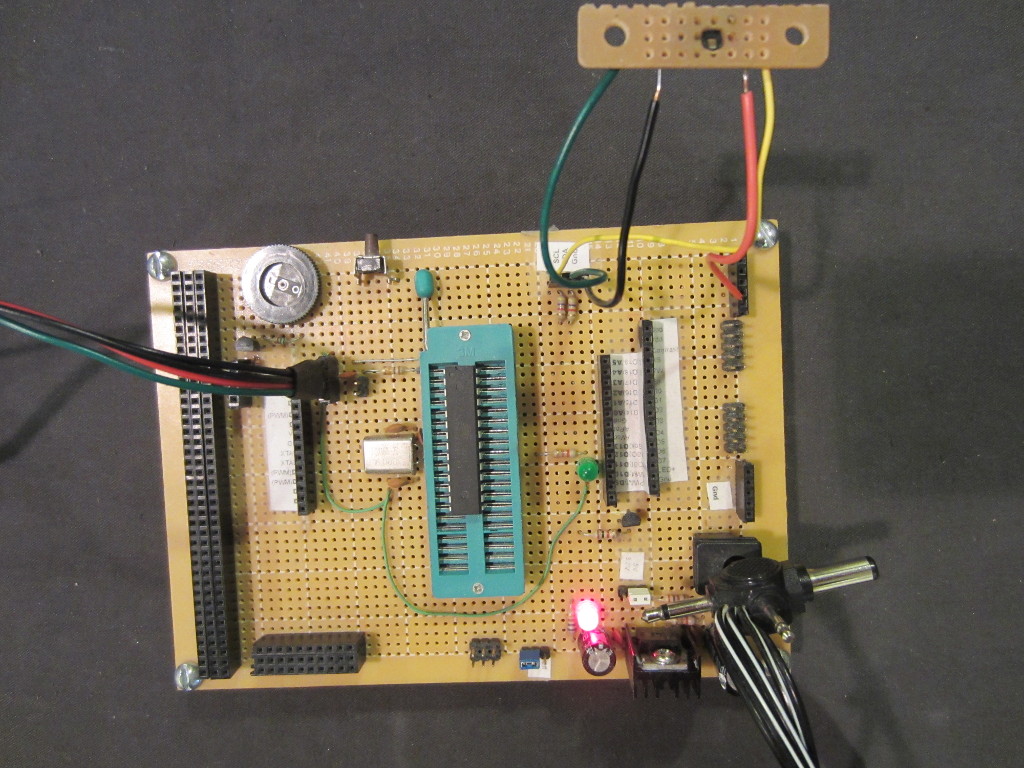
Here is a picture of the sensor mounted on an Atmega328p prototyping board I built many years ago.
Download
HDC1050 Arduino library: HDC1050.zip

