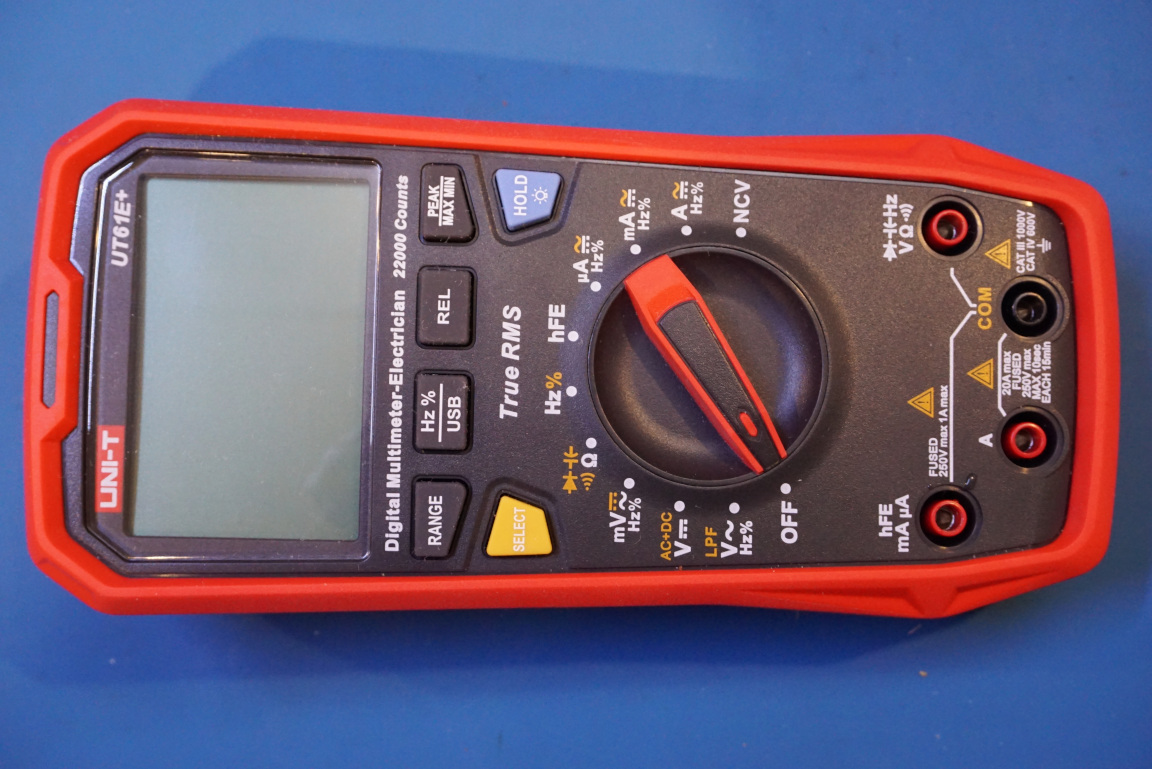
UNI-T‘s UT61E+ is a 22,000 count true RMS multimeter. It was released towards the end of last year and is the replacement for the out-going UT61E. I did a detailed review and teardown of this multimeter and you can check out the video linked below to see it in action.
Unlike the out-going UT61E, the UT61E+ is not independently certified. There is no UL or CE logos on the meter. UNI-T does offer a model that is CE certified (UT161E) and the only differences I can see between these two meters, at least from the product manuals, are the inclusion of different type of fuses. For UT61E+, both the 1A and 10A fuses are rated for 240V with a dimension of 6mm in diameter and 25 mm in length. Whereas for the UT161E, it uses a 600mA 1000V fuse for the low current range and the fuse is slightly longer at 6mm x 32mm. For the 10A range the fuse is an 11A 1000V fuse with a much larger 10mm diameter and it’s 38mm in length.
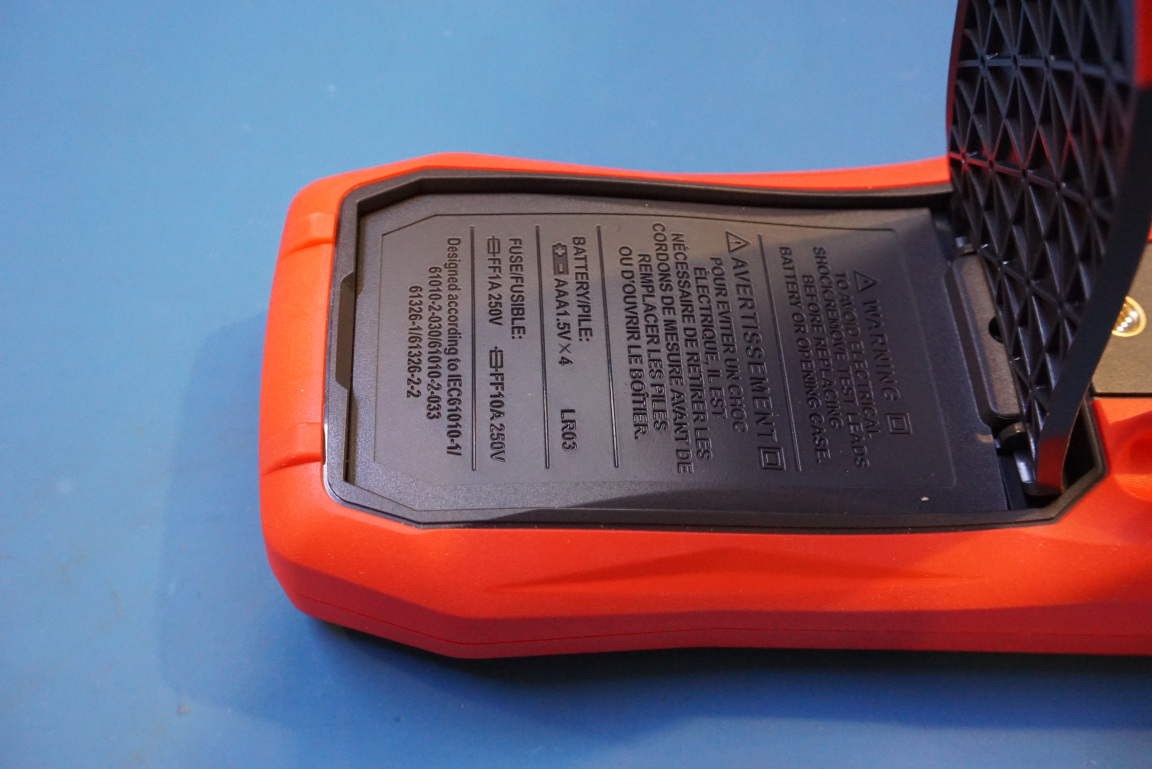
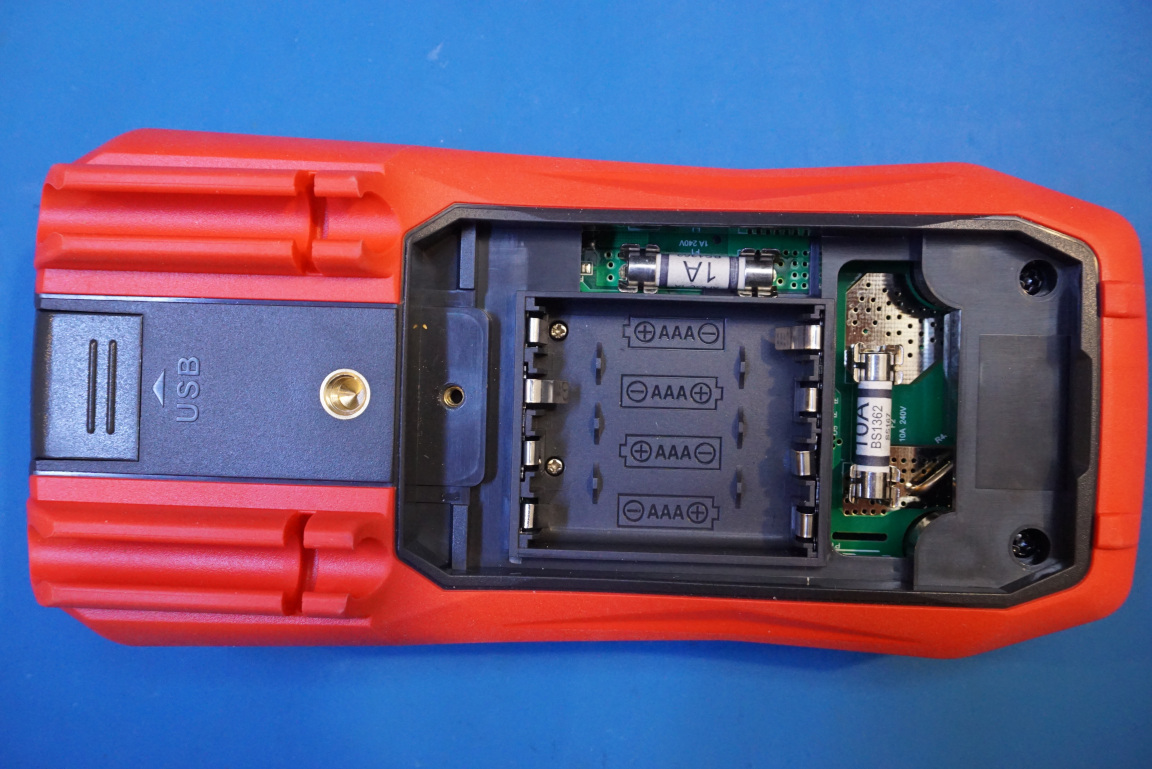
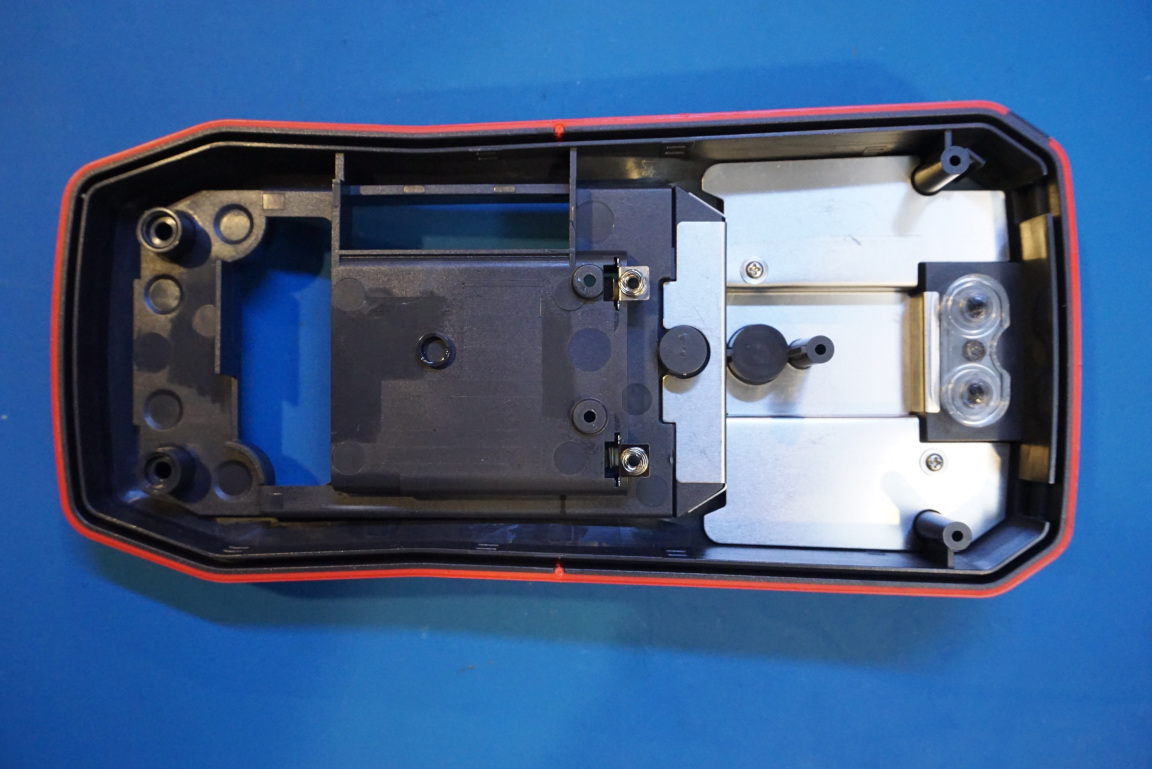
UT61E+ uses four AAA batteries. I do prefer meters using AA batteries as they typically offer longer runtime, but in my opinion, using AAA batteries is still better than using 9V batteries. The battery cover is secured by a single captive machined screws. You can also easily access both current ranges fuses easily.
Upon opening up the case, you can see that the circuit board is laid out very neatly. The aluminum back plate serves as the shielding cover and is connected to the ground via a spring contact. Note that the tabs are screwed on to the terminals. This arrangement ensures that there is no stress on the soldering points for those terminal connectors and therefore ensures long term reliability.

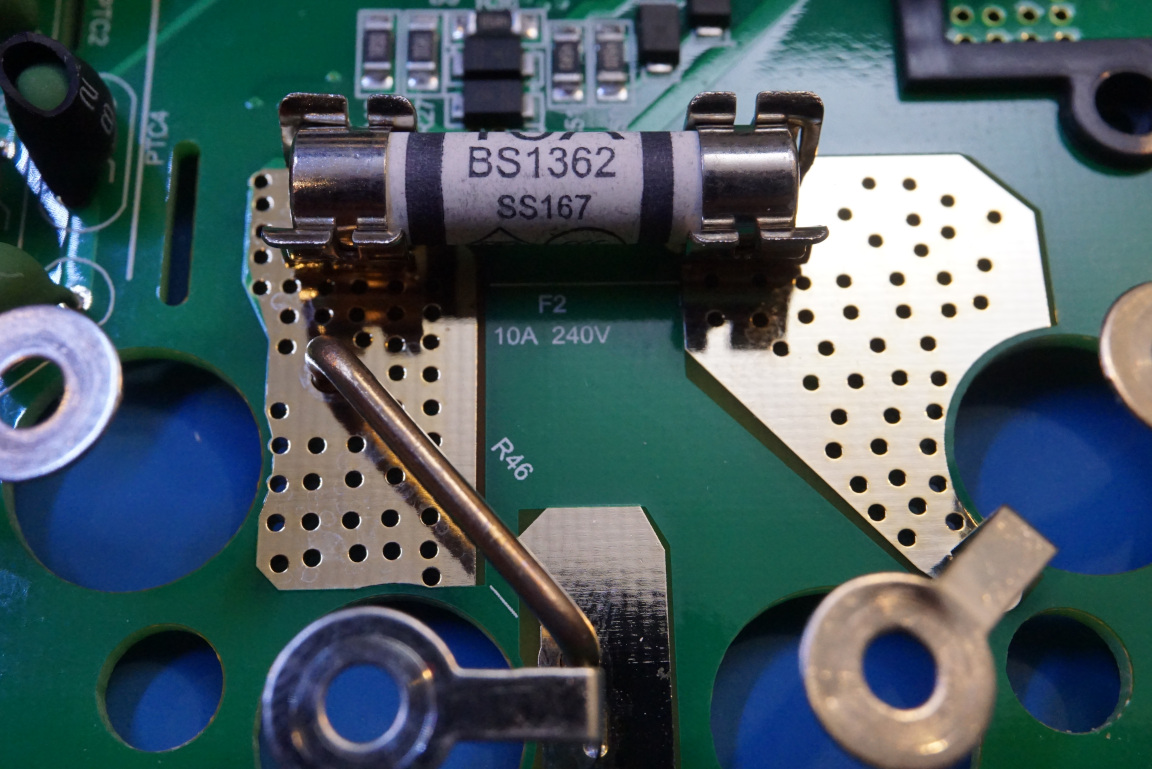
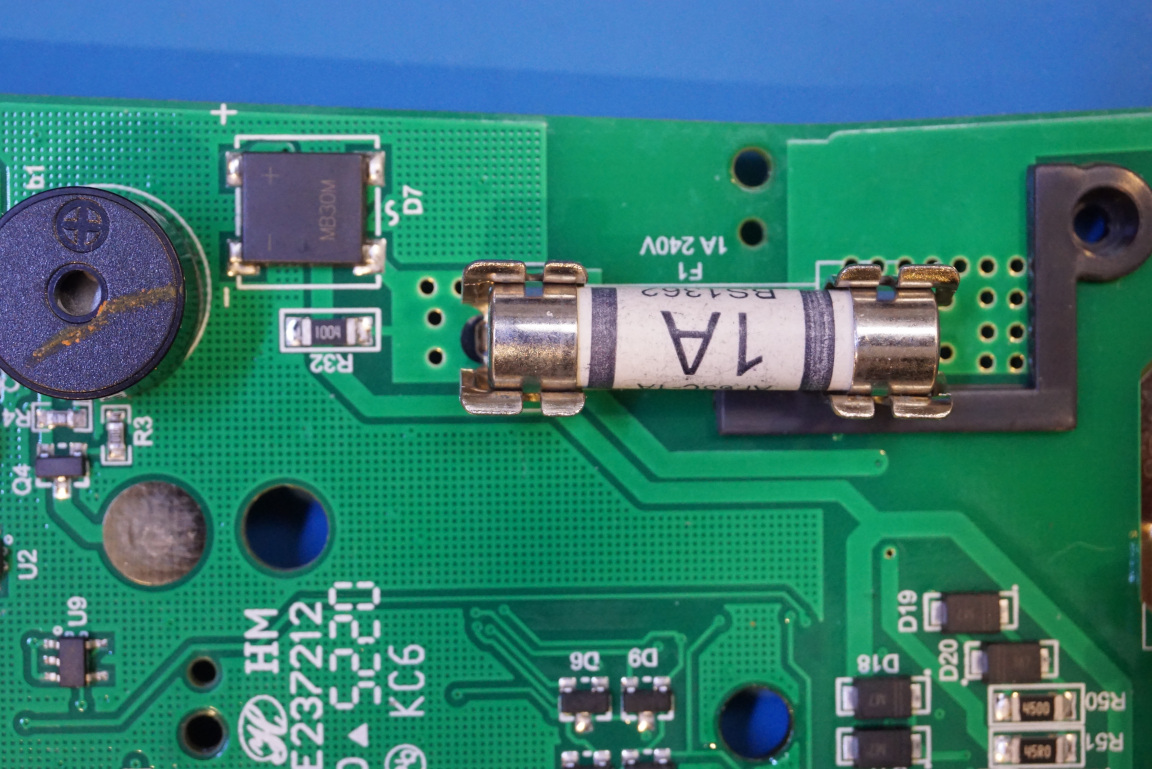
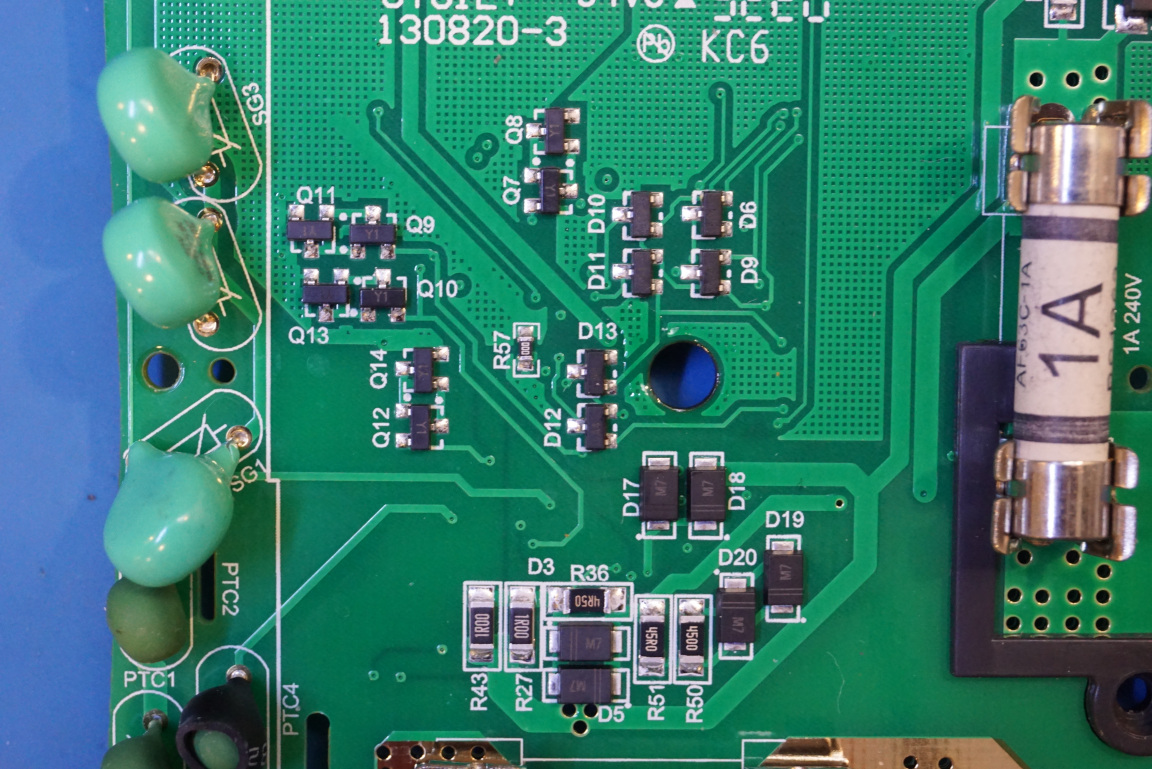
Here are a couple of close-up pictures of the fuses. Notice the gold-plated, via-stitched high current traces. In the picture to the right below, you can see a blast barrier/cutout around the 1A fuses. A high voltage cutout can also be seen in the picture to the left below.
One spec jumped out at me is the input impedance. For the UT61E+, the DC mV range input impedance dropped from the 3GΩ found in the UT61E to just 1GΩ. And curiously enough the AC mV ranges now only has an input impedance of 10MΩ, a far cry for the 3GΩ in the original UT61E.
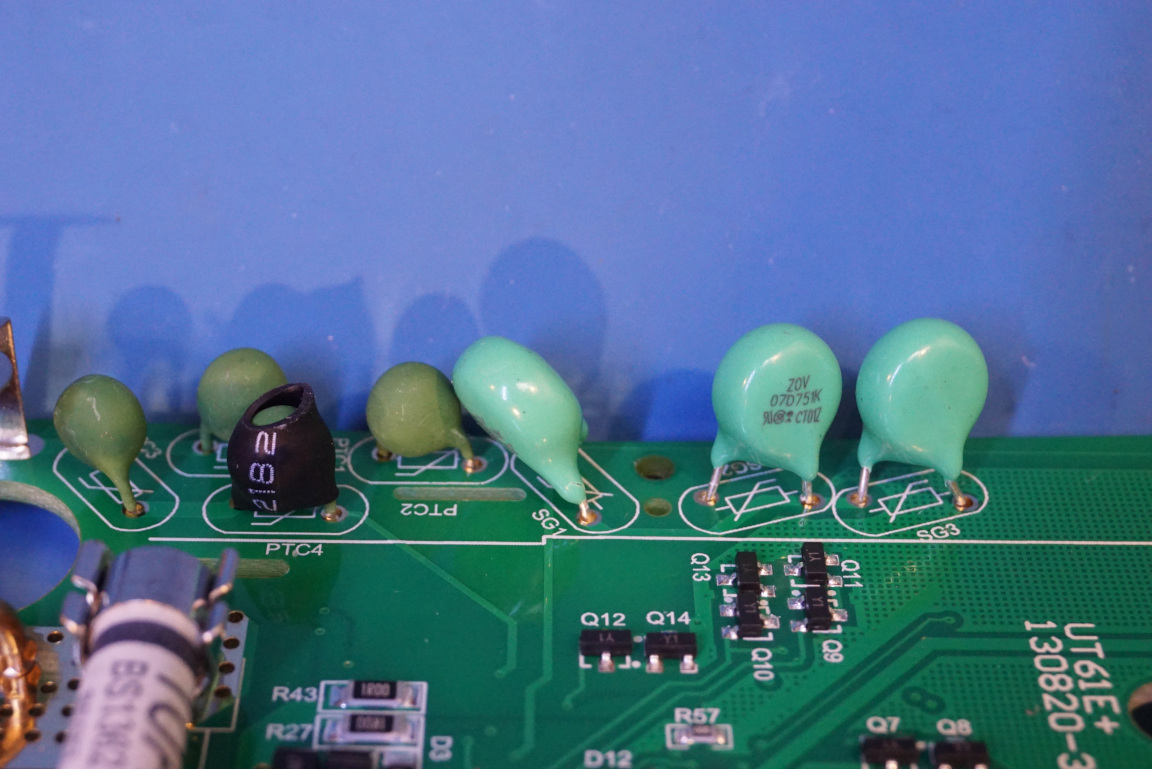
In the picture to the left below, you can see the precision integrated resistive divider and a high voltage capacitor. In the other picture, you can see the input protection NTCs and MOVs. These crucial input protection components are sometimes lacking in some cheap meters.

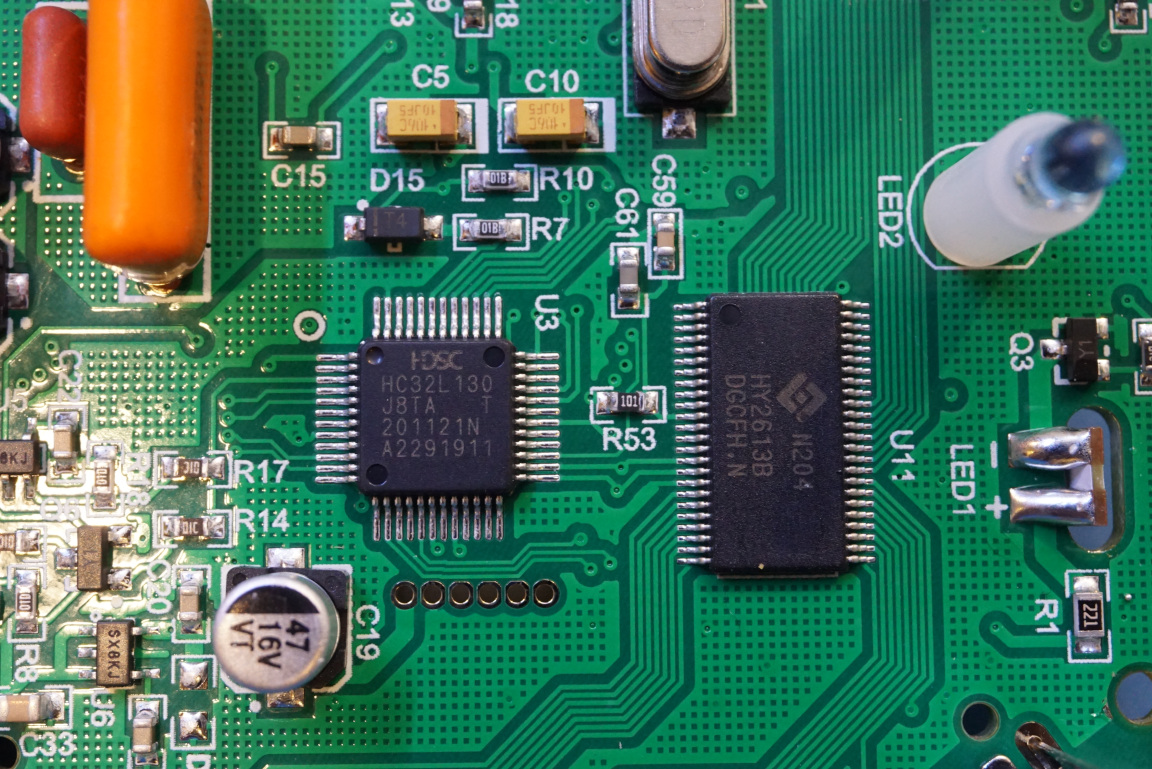
Here you can see the microcontroller used in the meter (HC32L130) and the LCD display driver used (HY2613B). I am not entirely sure what the purpose of that 14 pin SOIC chip is doing on the right.
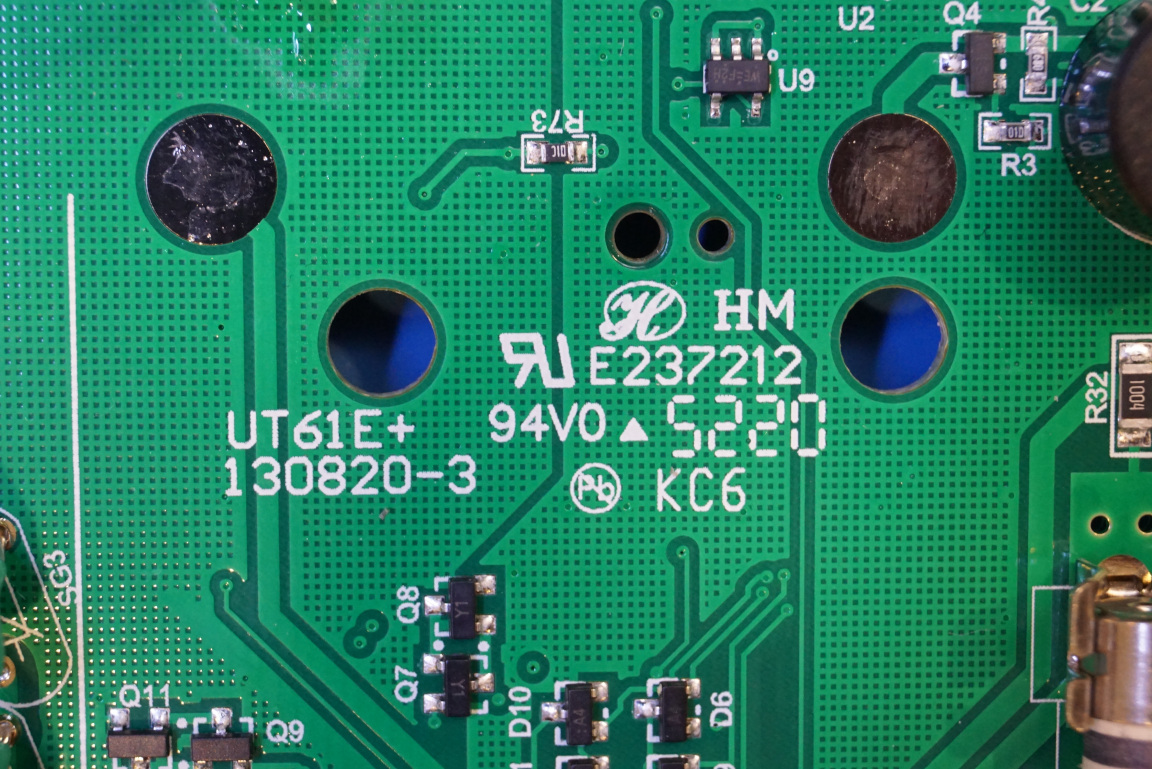
In the picture to the left below, you can see the markings on the PCB and it suggests that this board was made at the end of last year. Some input protection circuitry can be seen on the other picture.
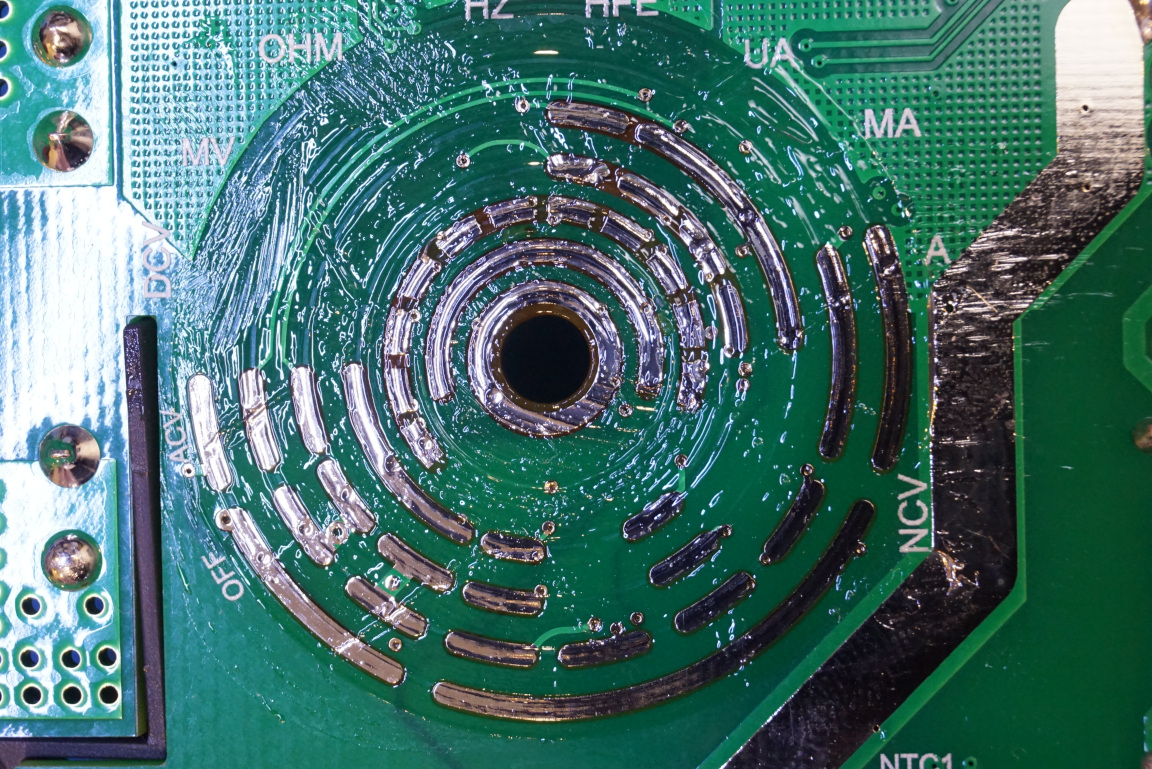
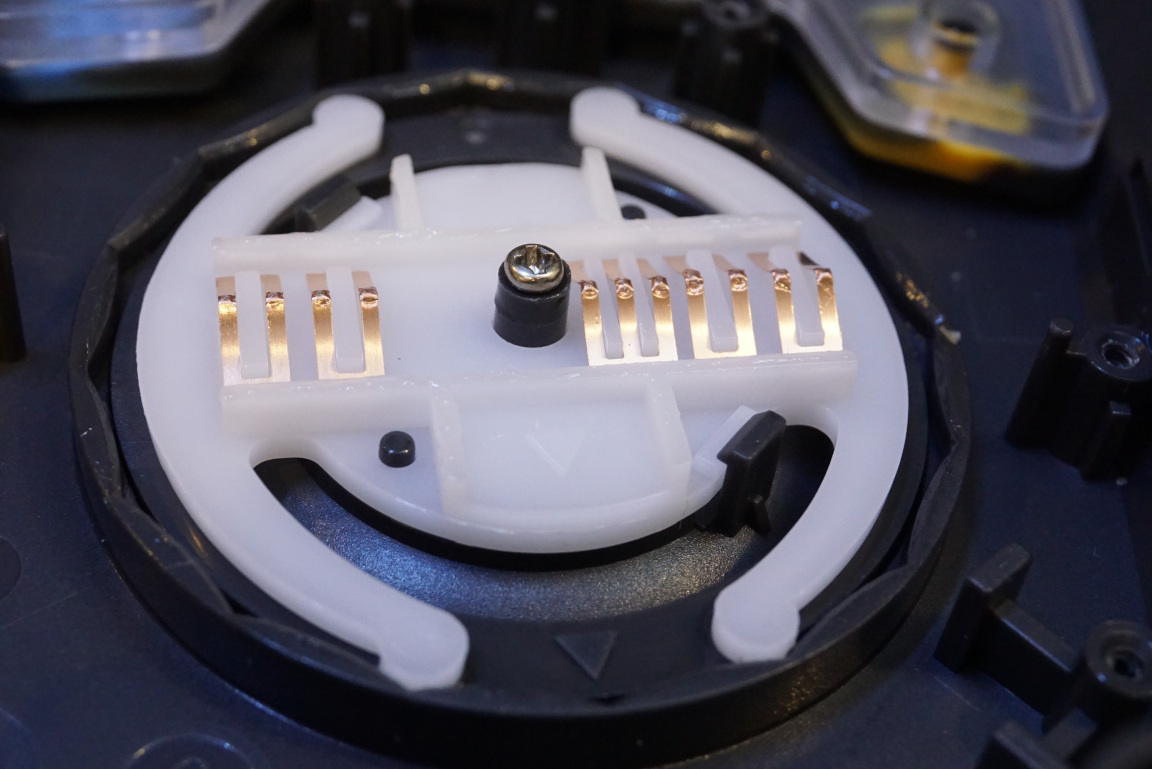
Below you can see the range switching PCB and next to it there is a beefy high current trace. The switching mechanism is shown in the picture to the right below. The springy plastic arms give the clicky feel when switching ranges. I am not a big fan of this design though as during my testing, I found that the range switch constantly got stuck between ranges.
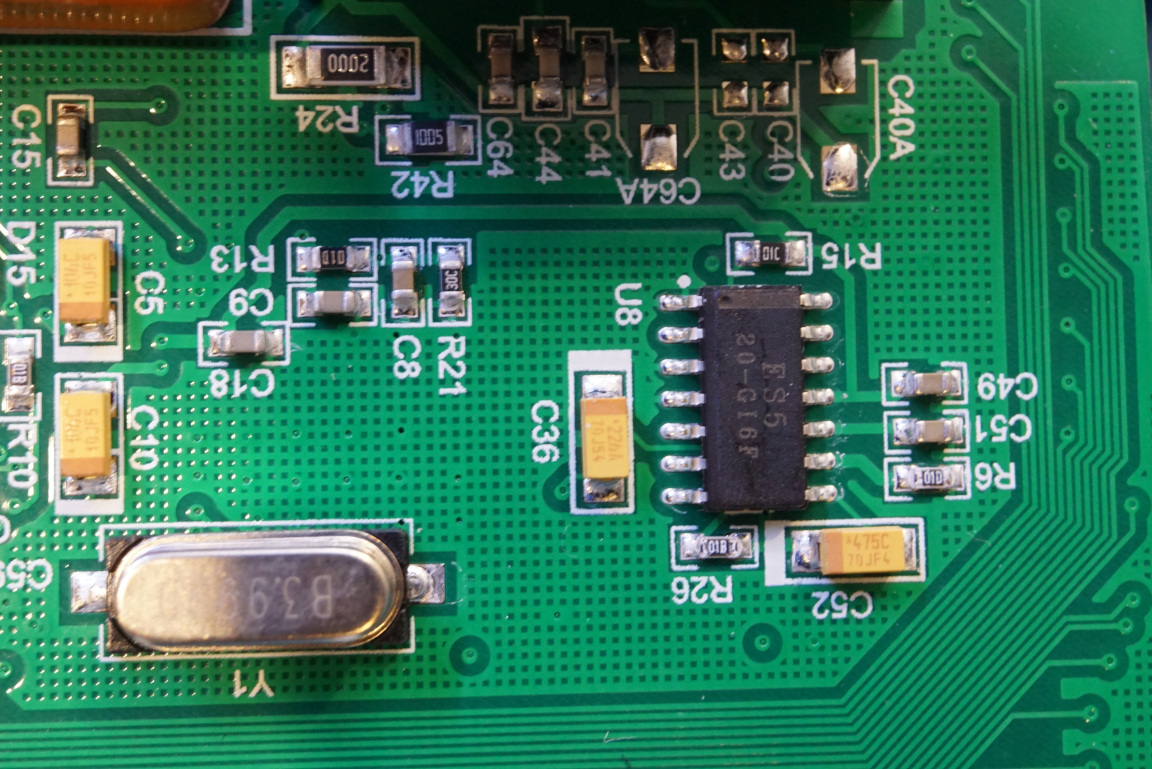
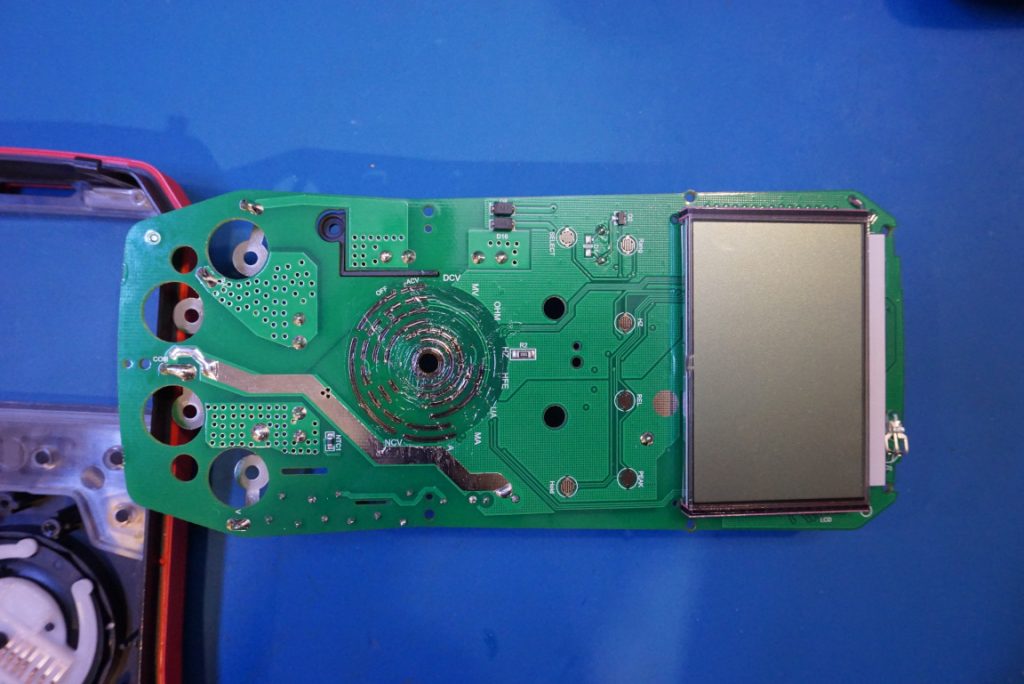
There is not much else on the front side of the PCB. The main DMM chip is tucked underneath the LCD. It is a CyrusTek ES232 30,000 count DMM analog front end chip.
During my testing, I found a few odd behaviors of the meter. When measuring slow varying DC signals, the meter at times had trouble settling in the correct range and sometimes the warning buzzer would be falsely triggered. You can see this behavior in my linked video review above.
One key feature of this meter is the ability to hook up to a PC via the included USB dongle. But I was not able to get it to work on my workstation which is running Linux (see screenshot below). I only managed to connect once, but afterwards I kept getting “Cannot enable. Maybe the USB cable is bad?” error. It appears that the the USB chip used is Silicon Labs‘ CP210X. When I get a chance may be I will find a Windows machine to test it out.

Update: this appears to be an issue with my Linux box as the included USB cable worked fine on a Windows machine.

