Download LCDControl.zip I needed an LCD control for a program I wrote, but after searching the internet, to my surprise, I couldn’t find one that I fits my need. So I decided to write one for myself.
Most enterprise developers often dread writing windows components, but it is actually quite easy in .Net. In this article, I want to show you how I created the LCD control. User Control You can create a user control that can interact with the Visual Studio .NET designer by creating a class that inherits from
System.Windows.Forms.UserControl
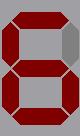
The easiest way to achieve this is to create a Windows Control Library project. After creating a Windows Control Library project, you can start writing code just as you would with any other windows form projects. The only thing that might be different is that you need to keep in mind that when the user drags the control onto a form, he or she would expect to see change in the graphics whenever he or she changes the parameter in the property editor. You would need to invalidate the control to force it to redraw itself whenever a parameter has been changed. The LCD Control The control it self is very easy. In order for the control to be able to display digit that the user supplied, we need to determine which sections are lit up. This is done via the display masks. The digits are defined by the code below:

private void InitDisplayMasks() { displayMasks.Add("0", 119); //1110111 displayMasks.Add("1", 36); //0100100 displayMasks.Add("2", 93); //1011101 displayMasks.Add("3", 109); //1101101 displayMasks.Add("4", 46); //0101110 displayMasks.Add("5", 107); //1101011 displayMasks.Add("6", 123); //1111011 displayMasks.Add("7", 37); //0100101 displayMasks.Add("8", 127); //1111111 displayMasks.Add("9", 111); //1101111 } And the numbers are displayed using the following code: private void Display(string letter, Graphics g) { int mask = 0; g.FillRectangle(new SolidBrush(backColor), 0,0, width, height); if (letter == null) { mask = 0; DisplayLine(mask, g); } else { mask = Convert.ToInt32(displayMasks[letter]); } DisplayLine(mask,g); } private void DisplayLine(int mask, Graphics g) { if ((mask & 1) == 1) DisplayLine_0(g, true); else DisplayLine_0(g, false); if ((mask & 2) == 2) DisplayLine_1(g, true); else DisplayLine_1(g, false); if ((mask & 4) == 4) DisplayLine_2(g, true); else DisplayLine_2(g, false); if ((mask & 8) == 8) DisplayLine_3(g, true); else DisplayLine_3(g, false); if ((mask & 16) == 16) DisplayLine_4(g, true); else DisplayLine_4(g, false); if ((mask & 32) == 32) DisplayLine_5(g, true); else DisplayLine_5(g, false); if ((mask & 64) == 64) DisplayLine_6(g, true); else DisplayLine_6(g, false); } Using the Control To use the control, you can either include it in your project, or add the component to your tool box by adding the dll to your toolbox. It is fairly easy to use it. The sample project demonstrate it by using a timer, every time the timer is invoked, the displayed digit is increment by one. The code is as following: private System.Windows.Forms.Timer timer1; private LCDControl.LCDControl Digit; private int i = 0; private void Form1_Paint(object sender, System.Windows.Forms.PaintEventArgs e) { Digit.DisplayDigit = Convert.ToString(i); } private void timer1_Tick(object sender, System.EventArgs e) { i = (i + 1) % 10; this.Invalidate(); } Final Thoughts You can add more stuff to display (besides digits) by adding more masks. It should be quite simple to do so. Kodanda Pani has a couple of wonderful articles ( Creating Custom Controls-Providing Design Time Support 1 and Creating Custom Controls-Providing Design Time Support 2) on how to create custom control and providing design time support. Also this article HOW TO: Make a UserControl a Design-Time Control Container Using Visual C# .NET on MSDN teaches you how to make a control a design time container.The code provided in this article is by no means bullet proof. Because it uses GDI function to draw the triangular line style that mimics the LCD display, it depends on the computers display capabilities. For instance, when running the code remotely using Terminal service, the lines would not be drawn with the triangle ends. You will need to create your customized code to achieve this.

