In the previous three posts(I, II, III), I showed you how to inherit from GridView control to create an extended control that can bind to a generic list of objects. In this final post of the series, I will show you a simple example to illustrate how to use the GridViewEx control.
4. Putting it all together
In fact, using an extended control isn’t that much different than using the stock control thanks to inheritance. For the most part, the extended control works exactly the same as the standard GridView control. I wanted to just touch base on a couple of places that a lot of people are having problem with.
First is the asp tag prefix issue. By default, all the custom controls (*.ascx) will automatically show up in the Toolbox strip within Vistuo Studio. So using the extended GridView is a simple matter of drag and drop. However, the default prefix for custom control is cc1, and depending on how many pre-existing custom controls there are on a page, it could be cc{num}. This becomes hard for replacing existing GridViews with the extended GridViewEx. To resolve this naming issue, we can register the assembly which contains the extended control within system.web->pages->controls tag in web.config:
With this prefix defined, we can use the tag ExtendedGridView wherever GridView is expected. By registering the prefix, we have also provided the solution to a second problem people often run into when using extended web controls–namely the ability to "skin" the control. With the extended control prefix registered, we can now create skins the same way as we do with other controls. For instance, my default.skin might look like:
In this way, the theming issue of the extended GridView is addressed.
The code for the code behind page to display the extended GridView is trivial:
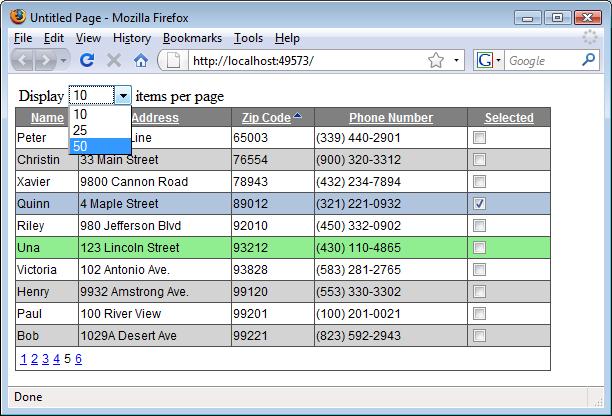
As you can see, the code is pretty much in line with what we would use for a typical GridView control. When the page is posted back, we set the DataSource and bind the data to the grid. Everything else happens transparently behind the scene. To illustrate the capability of GridViewEx, I included a CheckBox at the end of each row, whenever the check status is changed (CBSelected_CheckedChanged) we dynamically obtain the reference to the GridViewEx object (as an alternative, we could have used the actual control (GridViewEx1) instead of going through the trouble of dynamically converting if from the sender object since GridViewEx1 exists at compile time. Should the control be created dynamically, the code here will come in handy). Please pay special attention to how the checked state is determined. Because paging might be involved when the bound list has more entries than can be displayed, the current row index on the screen might not be the same as the row index in the list. To simplify coding, I created an Index function within GridViewEx to translate the selected row index into what is stored in the list.
The code samples provided in this series can be downloaded here.
Of course, there are a lot more fancy things you can do with the grid or with any objects in that matter. The only limit is your imagination…
See also
Code Download: ExtendingTheGridView.zip

