My seven year old 24 inch LCD monitor (Westinghouse L2410NM) started to flicker recently, so I decided to take a look inside to see what was wrong. Even before I opened it up, I had a pretty good idea of what might be the culprit. These older LCDs use CCFLs for back-lighting. CCFLs are typically quite robust. While it is not totally impossible, it is rather rare to see a failed CCFL. So most likely the issue is related to the power supply module.
To open up this monitor, I needed to first remove the stand and the screws at the bottom of the bezel. Besides those three screws, the whole panel is actually just held in place via some hard-to-undo plastic clips. I had to pry rather forcefully with a screw driver to free the LCD assembly. Clearly these things were designed more for aesthetics than repairability.
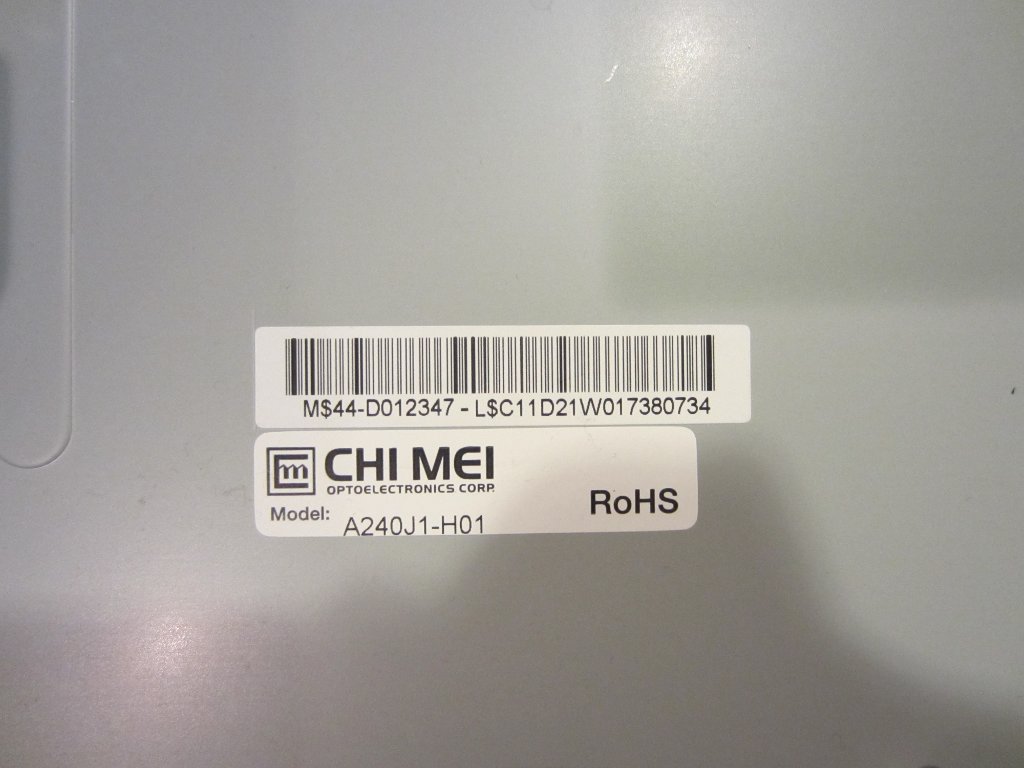
The whole interior is shielded as expected. Take a look at the sticker on the shielding in the picture below, it appears that Westinghouse L2410NM is just a rebadged CHI MEI LCD panel (or at least a significant portion of the LCD assembly was manufactured by CHI MEI).
It was relatively easy to remove the shielding, but again it was not designed for repairability as some of the connectors are covered with black tape (to match the case color presumably) and the tape must be removed before the cover can be lifted. The picture below shows the modularized boards (CCFL HV driver board to the left, power supply board at the bottom and the main controller board in the upper middle):
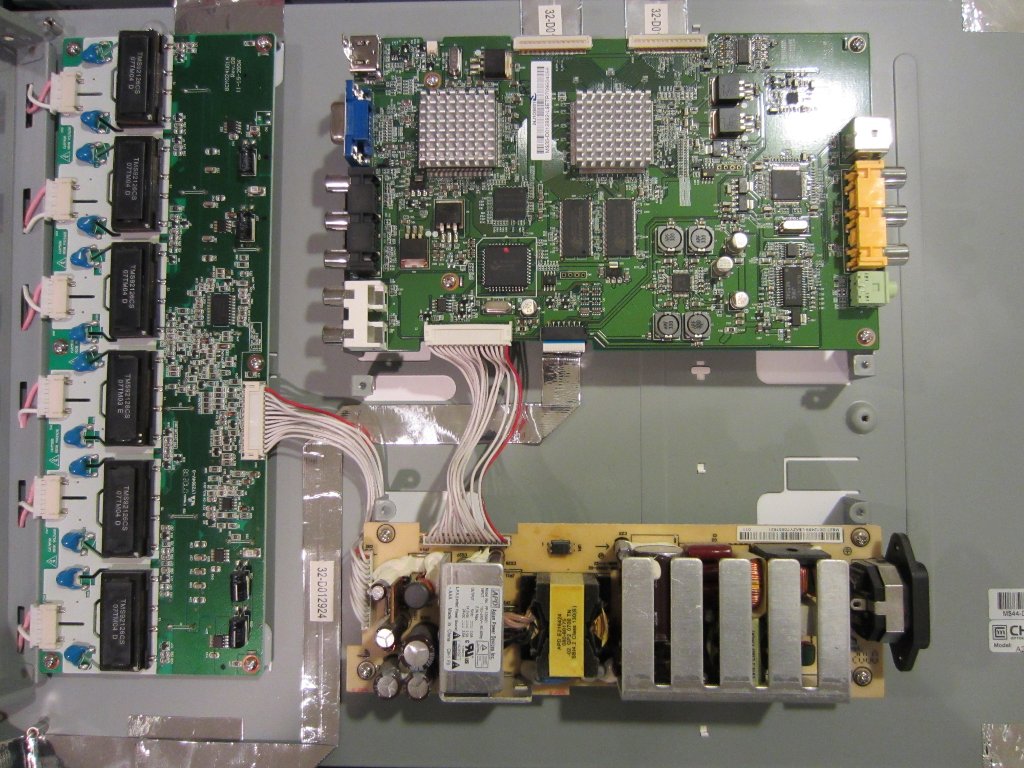
This modular design makes repairing job somewhat easier as each module can be removed, examined and serviced independently. Both the CCFL HV driver board and the main controller board are actually pretty well built and the electrolytic capacitors used in these two boards appeared to still be in good shape.
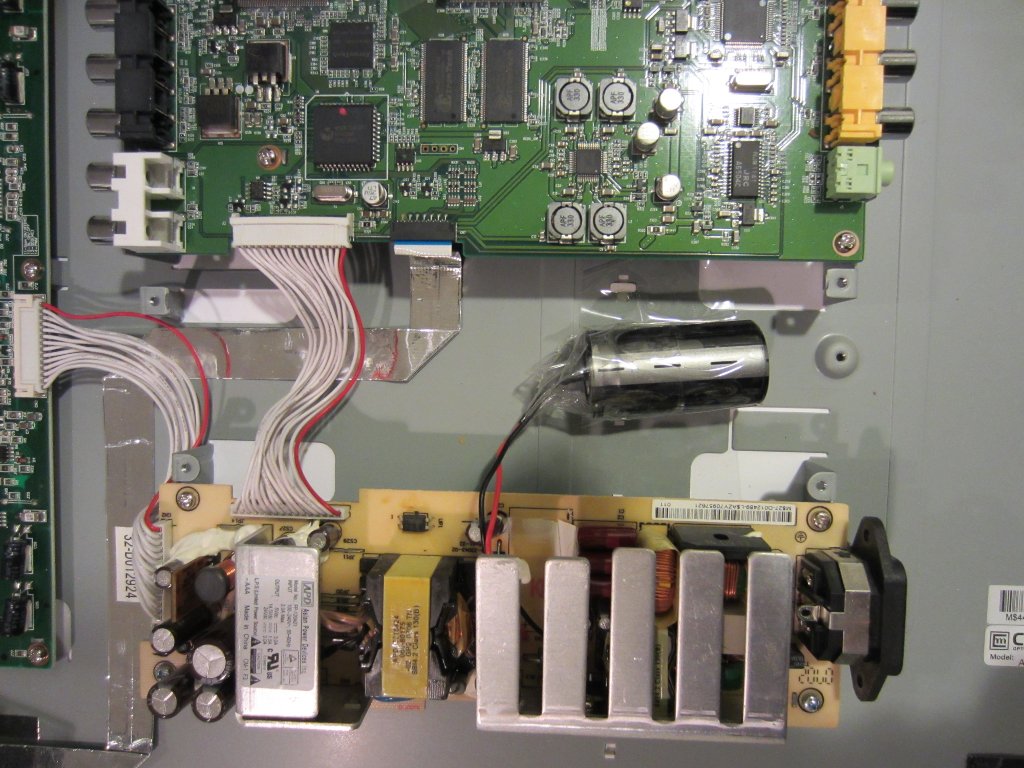
The build quality of the main switching power supply board on the other hand, is rather atrocious. Take a look at the main filter capacitor, yes it is tucked under the main heatsink. During normal operation, the heatsink gets rather hot (well above 150 F) and the poor capacitor is sitting just a few millimeters away from this massive heat source. I am actually quite impressed that the filter capacitor lasted this long. Given how much empty space there is inside this LCD monitor, the designer could have used a slightly larger PCB and placed the filter capacitor away from the heatsink.
Besides the issue of the questionable placement of the filter capaciter, the heatsink is not isolated (i.e. no SIL pads on the power transistors). If you accidentally short the heatsink with the rest of the metal casing, you will be shorting the switching transistor’s collector directly to the ground (there is a slow-blown fuse soldered near the power socket but in a dead short scenario, you will likely to have damaged some other adjacent components before the fuse is blown).
Due to the way the heatsink is mounted, taking out the filter cap was a bit of challenging. But it could be done without having to first remove the heatsink if you pry the heatsink fins up a little bit (see picture below). Again, you must remember to push the heatsink fins back down again after the filter capacitor is replaced as the protruding fins will likely touch the shielding after assembly and cause a short.
The main filter cap is rated 120uF/420V and while there was no apparent bulging or other visually detectable damages, it only measured less than 90uF however and clearly needed to be replaced.
The closest spec’d capacitor I had lying around was a 150uF/450V. But in this case the choice of the filter cap is not critical as long as the replacement cap meets or exceeds the original capacitance and voltage rating. To make sure the replacement cap stays cool, I hot-glued and taped it onto the metal shielding.
With the main filter cap replaced, the monitor works like new again.

