I wrote a tutorial a while ago on how to hand solder fine pitched LGA/QFN chips using perfboards. While The technique illustrated works well with low pin count chips, for many people it is still a rather daunting task to solder these tiny chips that way. Also, as the pin count increases hand soldering without using a board with proper footprint becomes much harder.
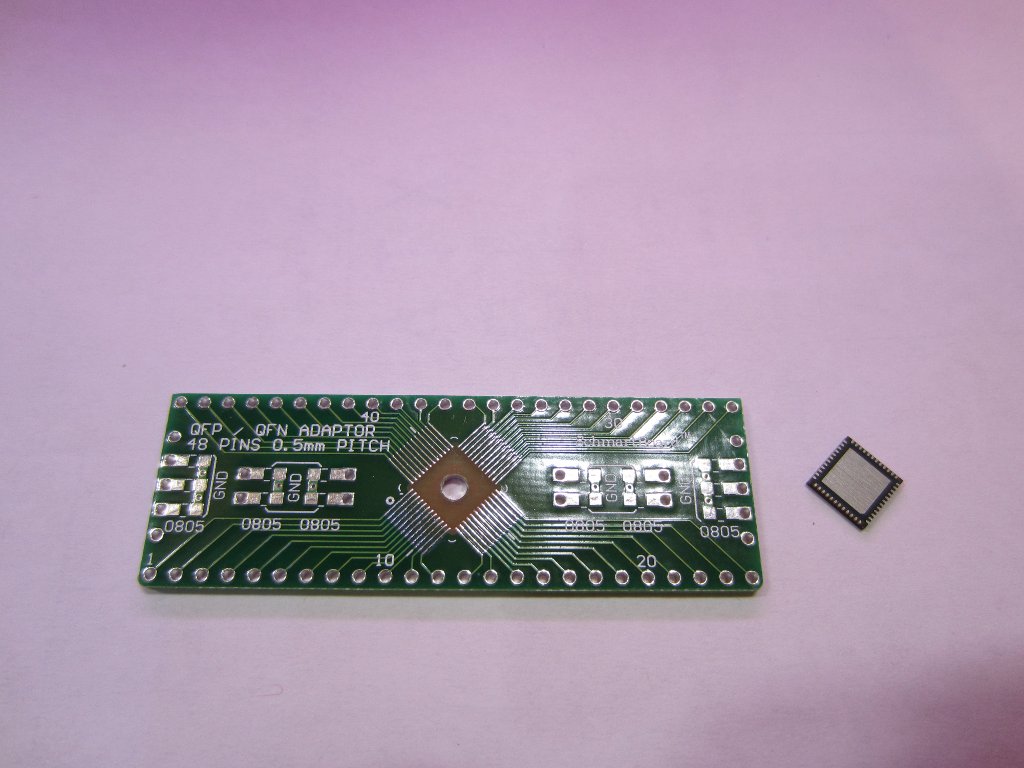
Luckily, using SMT adapters these high pin-count leadless devices can still be hand soldered with proper techniques. SMT adapters usually break out pins into standard 0.1 inch pitch, which is suitable for breadboarding or using with perfboards. In this post, I will give an example of soldering a 48-pin QFN chip onto a ScharmtBoard using a soldering iron and an SMT hot air reflow station. The chip I used is a TI MSP430F5342, which comes with a 0.5mm pitch in a 48-pin QFN packaging. The following picture shows the chip and a SchmartBoard QFP/QFN adapter.
The standard way for soldering a device like this is to first apply solder paste to the board using an SMT stencil. But for prototyping purposes, SMT stencil uses are usually not economical. So the first step is to tin the traces/pads. This step is relatively easy. First apply adequate no-clean flux on to the traces/pads and then run a iron tip gently along the traces so that each trace/pad is properly tinned. If you are comfortable with the drag soldering technique, you can drag a ball of molten solder around the traces and pads as well. The goal is to have adequate amount of solder deposited onto each pad so that the chip can later be reflowed.
When this step is done, there should be a pretty uniform layer of solder on each pad. While the exact amount of solder applied is important, it is better to err on the side of applying too much than too little as long as there is plenty of flux and no solder bridges. Using plenty of flux is the key here, as it will greatly improve the viscosity of the molten solder and thus leaving just the right amount on the pads. Afterwards, clean the board carefully.
The next step is to place the chip on the board. Prior to placing the chip, you will need to again use a little bit of flux on the tinned pads. When putting the chip down, make sure that the pin 1 indicator is lined up and the chip pads are roughly aligned with the pads on the board. Exact alignment is usually not necessary as the surface tension during the reflow process should be able to pull the chip back in place.
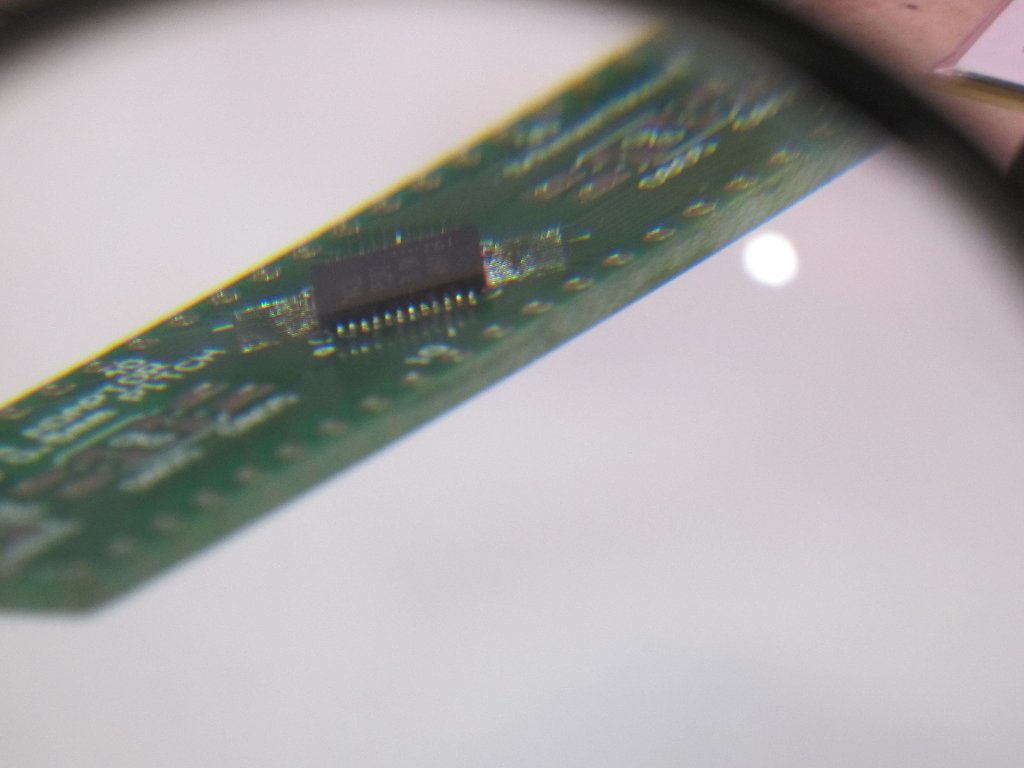
The temperature of the hot air should be adjusted according to the type of the solder used and the thermal profile of the chip. Usually 300 to 320 Celsius is sufficient. Make sure that the airflow setting is adjusted to low, otherwise the air flow could blow the chip away. When the chip is properly reflowed, the joints between the pads and the chip should look smooth (see magnified picture below).
After the reflow process, let the board cool down and examine the solder joints carefully. If you suspect that there are cold solder joints, you may need to reapply solder flux and reflow the board again. This can be done multiple times if necessary. Alternatively, you could use a fine-tipped soldering iron to touch up the questionable joints.
Most QFN chips have a ground pad in the middle, and in some cases this pad must be grounded or properly attached to a thermal relief. The way SchmartBoard achieves this is through a large via at the center of the board. After the chip is properly soldered, you can fill the via with solder from the back of the board and properly ground the chip. The solder mass also serves the purpose of a thermal relief. I would recommend doing this step only after ensuring that the chip is proper soldered as after filling the via, the large thermal mass would make it much harder to reflow.
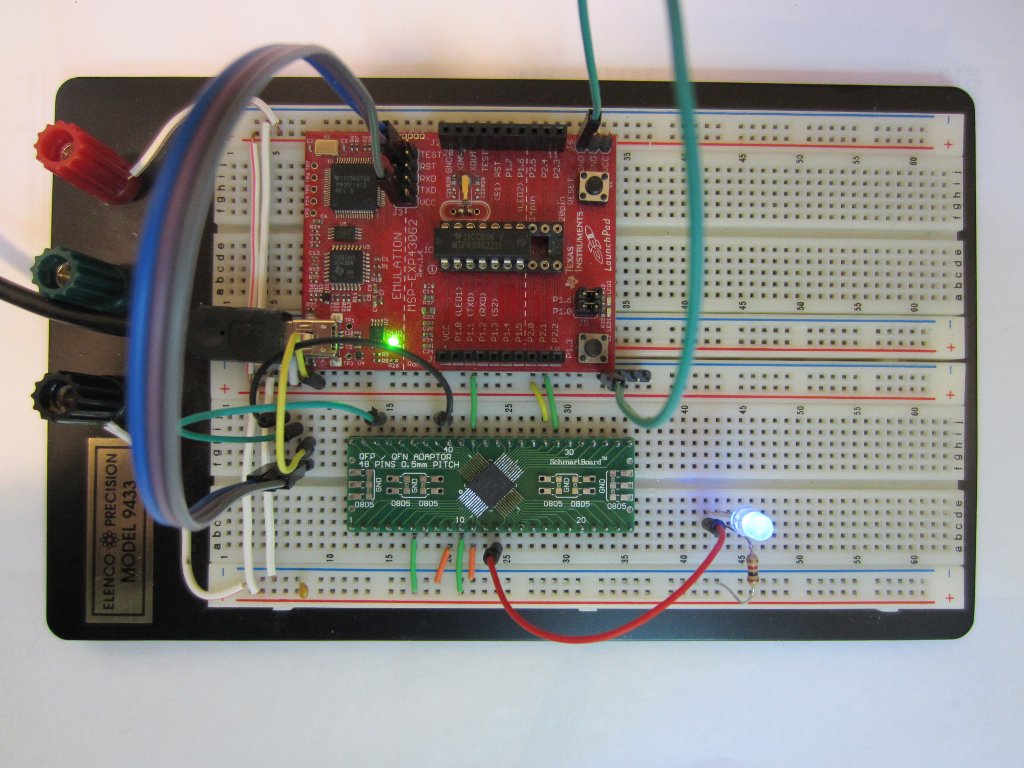
Finally, I used an MSP430G2 Launchpad as programmer and programmed a simple blink program onto the MSP430F5342 using the Spy-Bi-Wire interface to make sure that the solder job was done correctly.